
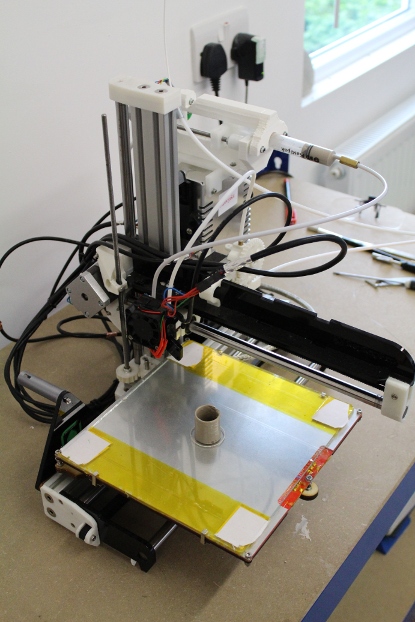
The RepRapPro Paste Extruder is intended to be fitted to our Ormerod RepRap 3D printer. It is shown here having just printed a clay cup, but it will work with virtually any material that has a toothpaste-like consistency at room temperature (including toothpaste…). You can buy the kit for it here.
The RepRapPro Paste Extruder is supplied as both a full kit and a hardware-only kit. For the latter you will print the plastic parts of it as one of your building actions. Details are in the instructions linked below.
These pages are the complete instructions for building, commissioning and using the RepRapPro Ltd version of the Paste Extruder. Like all RepRap machines and their components and add-ons, the RepRapPro Paste Extruder is fully open-source. It is licensed under the GPL. All the design files and software are available from the RepRapPro Ltd Github repository here.
General notes
- BEFORE YOU ATTEMPT TO ASSEMBLE ANY PART OF THE RepRapPro Paste Extruder, PLEASE READ THESE BUILD INSTRUCTIONS FULLY AND ENSURE YOU UNDERSTAND THEM. Although all supplied parts are covered by warranty, this will be invalidated by your not following these build instructions. Try not to rush your build, or you may miss out something vital!
- Give yourself plenty of space and ensure your work area is clean. Dust and dirt are a 3D printer’s worst enemy.
- Before you start the build, please ensure you have all the components as listed on the packing list included in the kit. If anything is missing or damaged, please contact us through our contact page.
- We understand that people may want to change aspects of the machine’s design, and in fact we encourage this as it is one of the benefits of open-source development. Before changing anything, please be aware that the RepRapPro Paste Extruder has been designed to work with the Ormerod 2 3D printer. So consider your changes carefully before you try to implement them. And when you find improvements, please tell us and the world so that we can include them in future kits, and so that existing owners can upgrade their own machines.
- The RepRapPro Paste Extruder is a robust device once assembled; however it does require a certain amount of care during assembly. If in doubt, force is usually not the answer! There are many ways to get support and advice; see below.
Get support
If you find you need help or advice with assembling, commissioning or using your RepRapPro Paste Extruder, you can use the following channels:
- Check the instructions again; we are regularly updating them with feedback from our growing user-base.
- Contact the support department of the company that sold you your printer.
- Check the RepRap community forum.
- Contact us on our irc (internet relay chat) channel RepRapPro on freenode irc
- Contact us via email; see our contact page.
Archived documents for older versions
There are no older versions of this product.
Tool List
Required
- Allen key: 2.5mm (M3 cap screw; the long reach type, with a ‘ball’ hex on the end, are very useful)
- 5.5mm (M3) spanner
- Two 8mm (M5) spanners, or one M5 spanner and an adjustable spanner.
For adjusting the plastic parts you print, if necessary
- Drill: 3mm
- File
- Half round needle file
- Sharp craft knife