Contents
Goal
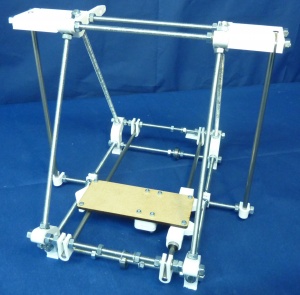
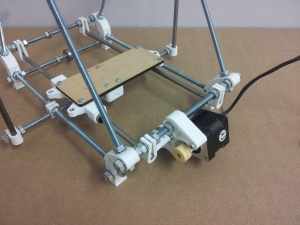
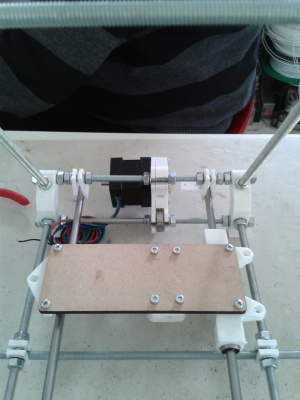
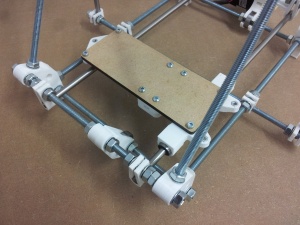
By the end of this stage, your machine will look like this:
Tools
You will need the following tools:
- Phillips screwdriver
- Adjustable spanner
- 1.5mm hex key (Allen) for M3 socket set screw (grub)
Sled assembly
| RP parts | Quantity |  |
 |
1 | |
 |
1 | |
 |
2 | |
 |
1 | |
| Hardware | Quantity | |
| Lasercut frog | 1 | |
| M6 smooth rods 270 mm | 2 | |
| LM6UU Linear bearings | 3 | |
| M3 x 12 screw | 4 | |
| M3 x 25 screw | 4 | |
| M3 nyloc nuts | 5 | |
| M3 nuts | 4 |
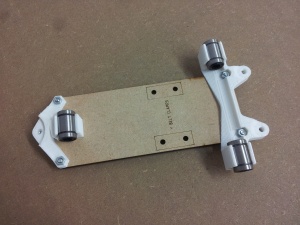
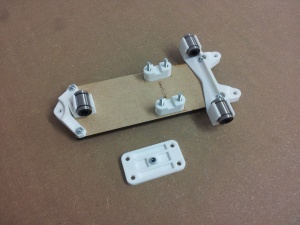
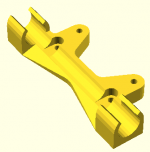
Assemble the parts of the Y sled as shown:
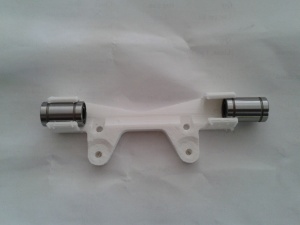
Push the bearings in from the side. Don’t try to clip them in from the top. They should be an interference fit and should stay where they are put.
When correctly fitted, the linear bearing should protrude by the same amount from each end of the bearing holders.
The screws should be inserted from the top of the frog (the side without the markings). Use the 12mm M3 screws and nuts for the bearing holders and the 25mm M3 screws and nylock nuts for the Y Belt Clamps. This image is showing the bottom of the frog (the side with the markings).
Fit an M3 nyloc nut inside the hexagonal recess of the belt tensioner, then loosely attach this to the frog assembly using four M3 nyloc nuts.
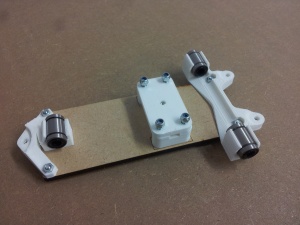
Adjust the gap between the 270mm Y rods at both ends so they are parallel and their inner edges are 103mm apart. Don’t tighten their clamps yet.
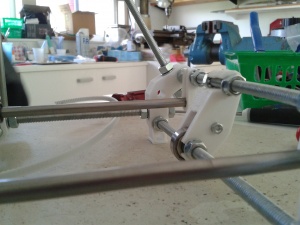
Slide the 270mm Y rods partly out of the machine, put the sled onto them, and refit their free ends into the frame:
Ensure the linear bearings slide freely along the smooth rods. If the bearings are a little tight, insert the smooth rod into a power drill, then spin the rod for a few seconds whilst holding a scouring pad over it. Clean the rod with a cloth, then try the bearing fit again.
Slide the Y sled back and forth. It should run completely freely. If it doesn’t, that means that the rods are not quite parallel – move their ends a little bit using the nuts either side.
Gradually tighten the ends of the rods, checking for free running right from end to end all the while as you do so.
Y motor and idler brackets
| RP parts | Quantity | 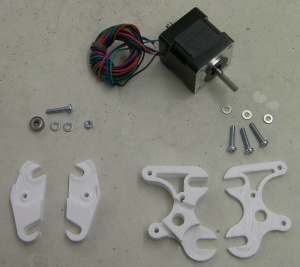 |
 |
1 | |
 |
1 | |
 |
1 | |
 |
1 | |
| Hardware | Quantity | |
| 623 bearing | 1 | |
| M3 x 16mm screw | 3 | |
| M3 x 20mm screw | 1 | |
| M3 washer | 5 | |
| M3 nut | 1 | |
| NEMA 14 stepper motor | 1 | |
| Toothed drive pulley | 1 |
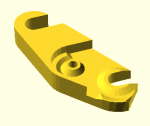
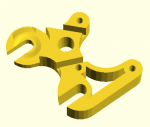
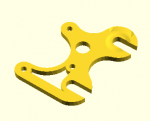
The next stage is to fit the Y axis idler and motor assemblies. Each end is made up of two printed parts and some hardware. Each end is in two parts to enable printing these components without the need for support material.
Motor end
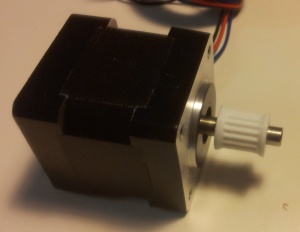
Take an MXL pulley and push it onto the motor shaft, taking care to note its orientation.
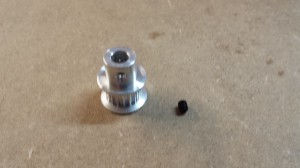
If you were supplied with aluminium pulleys (kits since Decemeber 2013), the pulley has a threaded hole in it for a grub screw to hold it on the motor shaft. Install the pulley with the pulley teeth closest to the motor body. The motor shaft has a flat on it; align the grub screw with this, and tighten the grub screw using a 1.5mm Allen key.
If you were supplied with printed plastic pulleys, the bore of the pulley is D shaped to match the motor shaft. One end of the pulley bore is round to make it easier to slide it onto the motor shaft. The pulley should therefore be pushed onto the motor shaft, round end first. It should be a tight fit, and you may have to tap it into place. Use a soft hammer, or a wood block. If you place a tube against the pulley that will fit over the motor shaft, you can tap the end of the tube to place the pulley. Support the motor shaft, not the motor body, from the other end as you tap. You can secure it with a drop of superglue if you like (make sure the shaft is completely free of grease). Take care that no glue gets near the shaft’s entry to the motor.
Leave a gap of about a millimetre between the pulley and the motor body, so the pulley can turn freely, and not rub against the motor body.
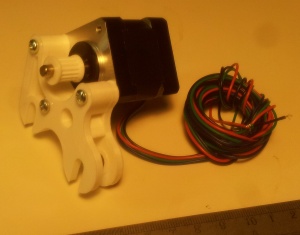
Screw the motor to the Y motor bracket using the three M3x16mm screws with washers under their heads (if the screws are a little short leave out the washers).
The Y motor goes at the back of the machine, with the motor to the left when looking from the front of the machine and the wires pointing in towards the 626 bearing slot.
Fit the the Y motor bracket either side of the 626 bearing, and between the serrated washers on the top cross bar.
Move the Y sled to be at the same end, and make sure that the motor is positioned so that the bearings line up with the centre of the two holes in the sled that will hold the toothed-belt clamp.
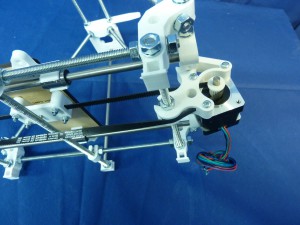
The Y axis motor end will now look like this:
Note the orientation of the stepper motor, with the wires pointing in towards the machine and the motor on the left of the bracket when looking at the machine from this end.
Idler end
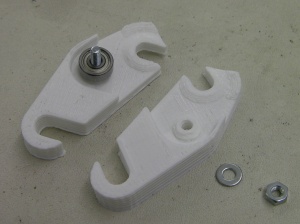
The Y axis idler end is also constructed from two printed parts. Screw them together with the bearing inside as shown, using the 20mm screw.
Move the Y sled to the front of the machine (i.e. the opposite end to the Y motor you just fitted) and use the Y belt holes to get the idler bracket in roughly the right place.
Measure the gap from one of nuts holding the motor bracket to the nut along from it that holds one of the smooth Y bar clamps.
Adjust the idler bracket so that the gap between its corresponding nut and its Y-bar-clamp nut is the same. Tighten the nuts to hold the Y idler bracket.
Y axis belt
| Hardware | Quantity |
| MXL belt | 600mm |
| M3 set screw | 1 |
For this step you just need one 600mm toothed belt. Your belt may have been supplied as a single piece used for both the Y axis and X axis assemblies, so when you cut off the excess belt you’ll want to retain as much as possible of the remainder.
Route the belt through the Y axis motor end, around the toothed drive pulley, under the bearing, along to the idler end with one twist so that the flat edge then goes under the 626 bearing, around the 623 bearing and back to the belt clamp. Feed the ends through and overlap the two ends of the belt by pulling it lightly and overlapping by about 5 or 6 teeth. Secure this overlap in the belt clamp by tightening the screws.
Line the belt up by eye. The top should be in line with the bottom and the belt should be square where it sits under the clamps.
Hand-turn the Y motor by holding the hub of the toothed drive pulley between your fingers. You will be able to feel the clicks as the motor’s rotor magnets run past the ends of its stator coils. Make sure everything on the Y axis stays in line and runs freely right from one end to the other and back.
Screw an M3 set screw (also known as a ‘grub’ screw) into the central captive nyloc nut to act on the belt to tension it. One side of the tensioner has the two belts clamped, the other should be free to run through the clamp. The M3 set screw pushes the belt up to tension it.


