
Goal
By the end of this stage, your machine will be ready for its first print.
Tools
- An object with a measured height (we use a length of 6mm diameter silver steel – the shank of a drill bit works well too).
Communications
USB Driver
If you have a Melzi controller, set the power selector jumper (PWR-SEL) on your controller board to USB. The power selector jumper is the three-pin jumper in the centre of the board, about 20mm left of the processor chip; check the jumper is on the two pins furthest from the screw terminals. The jumper is in this position as sent from us; if you have moved it, move it back. Leave the main power supply unplugged for the moment.
Windows
Plug the controller into a USB port on your computer. Does the computer complain that it has no driver for the USB device? If so, unplug the USB, then install this driver or find yours in this page. Then, when you plug the controller in, it should register as a COM port on your computer. If, when you plug your Melzi in, it is recognised as an ‘FT232R USB UART’ in ‘other devices’ in the Device Manager, you need to manually install the FTDI driver. See the ‘USB driver problems’ section in this section of the troubleshooting guides. For the recent issue of ‘fake’ FTDI chips, see the advice in this reprap forum thread.
Mac
Mac users should select a driver appropriate to their machine from: http://www.ftdichip.com/Drivers/VCP.htm.
As of August 2013, the current driver is named FTDIUSBSerialDriver_v2_2_18.dmg. This should work for all versions of Mac OS X.
You can check in the System Profiler, in the USB list, that an FTDI device shows up.
In Pronterface, connect to your printer through the device named /dev/cu.usbserial-XXXXXXXX, where XXXXXXXX is a unique 8 character id. This will appear in the drop-down ‘Port’ list. If you have more than one usbserial device attached to your Mac, you’ll need to remember which new device gets created when the cable is plugged in and remember its XXXXXXXX suffix. If there are no other usbserial devices, then when you run pronterface.py, you will see only one device in the Port list with a name starting with cu.usbserial — connect to that one.
Linux
Linux systems should recognize the controller straight away with no need for driver installation. The controller will automatically appear as something like /dev/ttyUSB0 when you plug it in. It is possible that you have to give acess rights to the USB Port (when there is the error message could not open port, permission denied) e.g. for USB0:
sudo chmod 666 /dev/ttyUSB0
Or better, on Ubuntu distributions and possibly others, make sure you as a user are a member of group dialout, by running the following command in a Terminal window:
sudo usermod -a -G dialout username
Replace “username” with your actual user name. Then log off and log back in.
Pronterface is used to control the printer’s basic functions, via USB. Any version of Pronterface should work with the Duet, though we supply a customised version for our customers.
Communications software – Pronterface
Installation
Windows
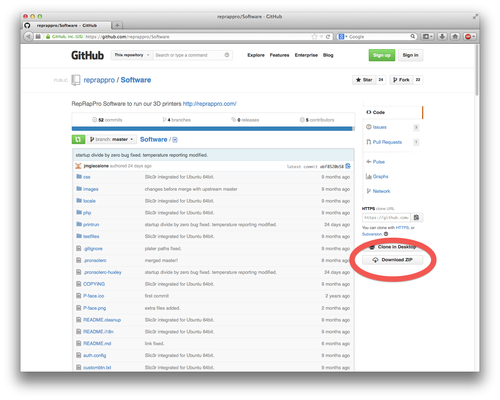
- Download the current version from https://github.com/reprappro/Software (click ‘Download ZIP’ on the right hand side).
- Once downloaded, extract the ZIP file to a sensible location.
- To run Pronterface, double-click the file ‘Melzi-[printer type].cmd’, where [printer type] is the printer you have; Huxley or Mendel. This will set up Pronterface with the correct bed size and shape. Do not run Win7/Pronterface.exe directly, or it will use Pronterface’s default setup.
Mac
Download the pre-compiled version of Pronterface for Mac, and extract the zip file.
Linux
- Download the current version from https://github.com/reprappro/Software (click ‘Download ZIP’ on the right hand side).
- Once downloaded, extract the ZIP file to a sensible place.
- The Linux version of Pronterface runs under Python. Install the dependencies; see the instructions HERE.
- To run Pronterface, double-click the file ‘Melzi-[printer type].sh’, where [printer type] is the printer you have; Huxley or Mendel. This will set up Pronterface with the correct bed size and shape. Do not run pronterface/pronterface.py directly, or it will use Pronterface’s default setup.
Start talking – Pronterface
The first thing to establish is that you can communicate with your machine. If you have a Melzi controller, set its power selector jumper to use USB power. The power selector jumper is in the centre of the board; check the jumper is on the two pins furthest from the screw terminals. The jumper is in this position as sent from us; if you have moved it, move it back. Leave the main power supply unplugged for the moment.
Connect your RepRap to a USB port on your computer, then run Pronterface. For Windows, run ‘mendel.cmd’ from the ‘Software’ folder. For Linux, run ‘mendel.sh’ from the ‘Software’ folder. For Mac, run the Pronterface application.
Now select the active serial port in the upper left. Clicking ‘Port’ is usually enough for Pronterface to select the correct port, but you may need to manually choose the correct one. Choose 115200 for the baud rate (or 250000 for older firmware). Click Connect, wait a moment, and the software will confirm when the printer is online. (Whenever the controller firmware is rebooted, it will take about ten seconds to respond.)

Press the GET POS button, and if the machine returns a position of X0.00 Y0.00 Z0.00 your serial communication is functioning correctly.
IMPORTANT. Next press “Check Temp”. Pronterface reports the temperatures in the bottom left of the window in the form ‘T:20.7/-273.0 B:21.8/-273.0′. ‘T’ is for the ‘Tool’ (the hot end) and ‘B’ is for the heated bed. The first number for each is the current temperature, the second is the target temperature. Check that both the hot end and the heated bed are reporting a temperature that is around room temperature (it may be a couple of degrees out – the thermistors are designed for accuracy at their operating temperature). If a temperature is too high then there is probably a short circuit in the corresponding thermistor circuit. If it is too low, then there may be an open circuit. Alternatively, your fimrware may have an incorrect setting, see next section. In either case, find the fault and fix it before you go on.
NOTE: If your pronterface window does not display the custom buttons (GET POS, BL, BR, CENTRE, etc… ), you most likely have installed a version of Pronterface previously, and the settings files .pronsolerc and/or .skeinforge already exist in your main User folder (the one with the main ‘Documents’, ‘Downloads’ and ‘Pictures’ folders in it – usually C:Users{username} on Windows). These files are invisible/system files, though; make them visible, delete the folders and reload the software. You should now see the extra buttons.
Confirm settings
The Melzi controller runs RepRapPro’s version of Marlin firmware. This allows many machine specific settings to be adjusted from Pronterface, without having to upload new firmware.
First thing to do is to set the EEPROM values to default. You only need to do this once. Send the following commands, by typing it into the command line in the bottom right hand side of the Pronterface window:
M502
This sets the defaults. The settings will scroll above the command line, in what we call the log window. Then:
M500
This saves the settings permanently (until you do it again) in the EEPROM. The log window should respond with “Settings stored.” Now press the reset button on the Melzi itself; this is in the middle of the board, on the opposite edge from the power connectors. You don’t have to disconnect Pronterface; after a few seconds, the printer will respond and be back online, and a list of the current settings will appear in the log window.
You can check the current settings any time you want, by sending an M503 command to the machine.
The log window should show something like this (These figures may not be the same as yours, it’s just an example of the output!):
>>>m503
SENDING:M503
echo:Steps per unit:
echo: M92 X91.429 Y91.429 Z4000.000 E945.000
echo:Maximum feedrates (mm/s):
echo: M203 X500.000 Y500.000 Z3.400 E45.000
echo:Maximum Acceleration (mm/s2):
echo: M201 X2500 Y2500 Z50 E2500
echo:Acceleration: S=acceleration, T=retract acceleration
echo: M204 S2000.000 T2000.000
echo:Advanced variables: S=Min feedrate (mm/s), T=Min travel feedrate (mm/s), B=minimum segment time (ms), X=maximum xY jerk (mm/s), Z=maximum Z jerk (mm/s), K=advance_k
echo: M205 S0.000 T0.000 B20000 X15.000 Z0.400 E25.000
echo: M206 X0.000 Y0.000 Z-0.250
echo: M208 X150.000 Y150.000 Z97.000
echo:PID settings:
echo: M301 P10.000 I2.200 D80.000 W70
echo:Thermistor settings: M304 Hh Bb Rr Tt, H0=Bed, H1..n=nozzle, b=thermistor beta value, r=series resistor, t=thermistor resistance as 25C
echo: M304 H0 B4200 R4800 T100000 M304 H1 B3960 R4700 T100000
FPU Enabled no
Each setting is displayed, along with a description. To change a settings, send the relevant command and parameter. For example, thermistor readings are interpreted on-the-fly, rather than with a lookup table, so the firmware needs to know the thermistor’s beta value (from the datasheet), the value of the series resistor (which can be seen near the relvevant thermistor connector on the Melzi), and the thermistor’s resistance at 25C. So, to set the nozzle thermistor parameters for a beta value of 3960, a series resistor of 4k7 Ohms, and a 100k Ohms resistance at 25C, send the following command (this is just an example, you don’t need to type this in):
M304 H1 B3960 R4700 T100000
Any settings updated from pronterface will take immediate effect, however they will not be saved to EEPROM (non-volatile memory) until you send an M500 command. Following this, the settings will persist following a power off.
Axes
Motor movement
DO NOT CONTINUE WITHOUT CHECKING CURRENT LIMITS!
If limits are not set, the driver boards will most likely be destroyed.
Melzi adjustment
If you have Melzi controller electronics you should already have set its motor currents as described previously.
Important – Melzi jumper settings
Move the power selector jumper (in the centre of the board) to the two pins nearest the screw terminals. This will power the logic from the main power supply, not from the USB.

Also make sure the autoreset jumper (at the end of the board by the temperature sensor inputs) is not in place; just hang it on one pin for safe keeping. It you don’t do this, the board will reset every time you connect to it… including during prints!

Sanguinololu adjustment
NOTE: The Sanguinololu board looks like this: Sanguinololu info, and was supplied up to April 2012 for Mendel kits, and August 2012 for Huxley kits. After these dates, all kits use Melzi v2 electronics.
The adjustment of the Pololu stepper drivers that go on the Sanguinololu board is described here on the Pololu site. See the section called Current Limiting. But ignore the bit on that page about the reference voltage being measured at a via – the easiest place to measure it is on the rotating metal part of the trimpot itself. Adjust the trimpots to 0.4v by slowing turning clockwise while checking the voltage reading with a multimeter.
Then for both Melzi and Sanguinololu
Plug in your power supply. Watch for smoke in case something has gone horribly wrong! Also, make sure that the motors and – more importantly – the four motor driver chips – aren’t getting hot. With the current limit correctly set, they should be slightly warm to the touch. Take care with the chips – they have internal temperature shutdowns that kick in around 80oC, a temperature that will burn your finger unless you just touch lightly and briefly.
Plug in the USB and run the Pronterface program. Click “Connect” and wait for your RepRap to appear online.
Now type:
G1 X5 F500
in the field below the log window and click Send. The X-motor should move to 5mm in the positive direction (X5) at 500mm/min (F500).
Now type:
G1 X0 F500
and send. The X-motor should move back to its starting location (X0). If you find that your machine will not move in the negative direction, your endstops are probably not wired correctly. Refer to the Huxley wiring page or the Mendel wiring page to check your wiring.
Repeat the above test for the Y axis, replacing the ‘X’ in the above command with ‘Y’.
For Z, make the feedrate 200 mm/minute:
G1 Z5 F200
Now test the E (extruder) axis:
Warning: do not do this whilst you have filament in the extruder. The M302 command allows cold extrusion, enabling the extruder motor to move irrespective of the hot end temperature.
For E type:
M302
before sending:
G1 E5 F500
You may find that some axes judder or whine but don’t move. This could mean that your frame may not be aligned correctly causing the axis to bind, the belts may not be tight enough (or too tight), or the axis stepper driver current is set a little too low.
To check your frame alignment; for the Y axis, check the smooth rods are parallel, and the bed moves easily with the motors turned off – see the Y axis assembly page. For the Z axis, the X axis may not be very level (see ‘Alignment’ section on this page) or the Z smooth rods may not be parallel (see ‘Aligning the frame’ section on the frame assembly page).
To adjust the stepper driver current, turn off the power, then rotate the appropriate potentiometer just a little to increase the current. Put the power back on and repeat the tests above.
Motors going backwards
RepRap works with right-handed Cartesian coordinates relative to the bed not the frame. That is to say that looking down on the bed from the front of the machine X runs from left to right, and Y runs from front to back (like a graph). Z runs up towards the top of the machine.
Remember that it is the movement of the printing head that counts: when Y increases, the bed will move towards you.
If you find that an axis is backwards, it is simple to reverse its motor: just power down and then reverse the order of its wires into the controller, so, for example, [black, green, blue, red] goes to [red, blue, green, black]. Don’t forget to turn the power off before disconnecting and connecting wires.
Note: Melzis shipped before 16th May 2013 have the X axis direction inverted, so if you have a Huxley with MXL belt, shipped before this date, you will either need to update your firmware or swap the wires as described above.
Endstops and Homing
The endstops are only checked during homing. To check they are functioning correctly, send the command:
M119
You should get the response
SENDING:M119
x_min:L y_min:L z_min:L
Test each endstop by holding down the microswitch and send the command again. With the X microswitch pressed, you should see:
SENDING:M119
x_min:H y_min:L z_min:L
The X axis endstop is ‘H’ for High, and is functioning correctly. Release the microswitch, and test the others.
Then test the endstops with each axis. Send a homing command for the X and Y axes in turn. Either press the ‘X’ and ‘Y’ homing button in Pronterface (above the ‘dial’ on the left of the Pronterface window), or use the homing command: for example
G28 X0
As soon as you press ‘Send’ and the axis begins to move, activate the relevant limit switch to halt movement of the axis. If activating the switch does not halt your axis, check your wiring (Huxley here or Mendel here). Then try each axis again, allowing the carriage to move until it hits the microswitch. Adjust the position or angle of the endstop until the carriage hits it in the right place.
(If the machine stops before reaching an endstop it may be because the endstop is being falsely triggered by interference from the stepper motor wires.)
For the Z axis, we need to check the Z endstop is high enough on the Z smooth rod to trigger the switch without the head hitting your heatbed. To do this, screw the Z endstop adjuster, which you installed during the Z axis assembly, until about 4mm projects below the X motor mount. Slacken the h bracket that holds the Z endstop switch. Position the Z endstop switch quite high, then home the Z axis, by pressing the Z home button in Pronterface, or sending the command:
G28 Z0
If the nozzle is going to hit the bed, press the microswitch. When you press it the first time, the nozzle will start moving back up. Release, and it will come back down again. Finally, press the microswitch again to stop movement. Move the endstop up and try homing again. You want the endstop adjusted so that when the adjuster screw hits it, the extruder nozzle is about 1mm above the glass. Tighten the h bracket.
Before homing all the axes at once, the heated bed needs to be roughly level, or the nozzle may hit, or even worse, drag across it. If you are concerned this may happen, turn the Z endstop adjuster so it projects a couple more mm below the X motor mount.
Finally, press the HOME ALL button and your machine will find its reference position at X0 Y0 Z0.
Alignment
Level the X axis
You already did this during the construction of the Z axis, but check it again. Measure the distance between the top of the X end and the top (or bottom – but be consistent!) of the Z motor mount, at each side of the machine. Adjust until the distance is equal, by turning one of the Z motors.


(Picture shows a Tricolour Mendel, but the process is the same for Mono Mendel and Huxley)
Level the bed
Level the bed with the glass clipped in place with the four bed clips.
One of the major differences between the standard pronterface and the eMAKER version is the way the machine is manually controlled. You have five buttons which enable you to position the head above the four corners of the bed and over the centre. The Z axis can be moved in increments of 0.1mm, 1mm and 10mm. The E axis can be moved by the amount specified in the distance spin control. The speed of manual moves can be specified in the spin controls above the manual move buttons.
To level the bed, move the head up such that you have at least the height of your measured object between the head and the bed. Then position the head in the centre and bring it down gradually until it is almost touching the object.
Press ‘Motors off’ in Pronterface (top left of Window). It is quickest to level the bed by moving the X and Y axis by hand, but the following can be done by using the buttons, or moving the axes directly, in Pronterface.

- Move the X axis over to the left edge of the bed, with two bed height adjusters, and move the Y axis so that the nozzle is as close as possible to one of the adjusters, but still over the bed. Adjust the adjuster so that the nozzle just touches your measured object. Tighten the locknut under the bed, recheck the nozzle height.
- Move the nozzle to as close as possible to the second adjuster on the same side. Adjust the adjuster so that nozzle touches your measured object. Tighten the locknut under the bed, recheck the nozzle height.
- Move the Y axis, so the nozzle travels along the edge of bed, from corner to corner, checking the height is even. Adjust the adjusters as necessary.
- Move the nozzle to the centre of the Y axis, and over to the other side of the bed in X, so it is near the single adjuster. Adjust the adjuster so that nozzle just touches your measured object. Tighten the locknut under the bed, recheck the nozzle height.
- Move the Y axis, so the nozzle travels along the edge of bed, from corner to corner, checking the height is even.
You may need to repeat the above the first time you do it, if you run out of adjustment.
When you have finished, the nuts on the M5 screws should be completely tight against the bearing mounts so the bed won’t move in operation, except on the springs.
Bed STILL not level?
A number of other factors can affect getting the bed perfectly level. Usually, it is because the Y axis smooth rods are not level, so while one side of the bed is flat with the nozzle, the other side rises and falls. You will see this in step 5 above. check the following:
- Check the machine is sitting on a flat surface. Wooden furniture, by and large, is not flat. But thick kitchen worktops are very flat.
- Small alignment problems with the frame. It’s worth doing the frame alignment list from here: https://reprapltd.com/reprappro/documentation/mendel-tricolour/frame-assembly/#Aligning_the_frame.
- Check that nothing is caught under one of the feet.
- Check that the Y axis smooth rod clamps are evenly clamped.
- If you still can’t get the bed quite level, you may need to place a shim under one vertex foot, like a folded piece of paper, to get the bed perfectly level. If the side of the bed with two adjusters is level, put it under one of the feet on the other side.
Distorted Bed
Unavoidably sometimes the aluminium heat spreader or glass is not quite flat; it is saddle-shaped with two diagonal corners one or two tenths of a millimeter low, and the two other diagonal corners high. Of course, it is geometrically/algebraically impossible to correct for this by adjusting three screws to define a first-degree (i.e. a linear) plane – a saddle is a second- (or higher-) degree surface.
But it is easy to fold a little aluminium foil to act as a shim under the glass in one corner to make the glass planar. Then you can use the three screws to get things spot on.

If you find yourself tempted to use the foil trick in more than one corner – don’t. Just use it in one corner then take the time to use the screws as above to correct for every other out-of-level error.
Set your Z height
With the head at Z0, the tip of the nozzle should be just touching the bed. To achieve this, follow the sequence:
- HOME ALL
- Send the following command: G1 Zz F200, where z=the height of your measured object.
- CENTRE
- Check that the head is within 0.3mm of your object.
- For Huxley, adjust the height of the Z axis endstop, or for Mendel rotate the adjustment screw, and repeat until your height is set.
- Check by Homing Z over the centre. Move the nozzle up 0.1mm in Pronterface, and check that a piece of paper can just slide underneath. It is no bad thing to be slightly lower and squash the first layer; it will help the filament stick to the bed. It’s better than being too high, at which point you may have difficulty getting filament to stick.
Setting offsets
Depending on the distance of the endstop switches to the bed, it may be necessary to offset the nozzle in order to print in the middle of the bed and use its full area. Home the X and Y axes, then check if the nozzle of the first extruder is over the corner of the bed by sending the command G1 X1 Y1 F9000. If this is not the case, large prints will fail because they will not be on the bed. Set the offsets by using the command M206 X<value> Y<value>. For example, with M206 X-40 Y-10, you offset the X carriage from the X endstop by 40mm, and the bed 10mm from the Y endstop. The M206 offset needs to be set with NEGATIVE numbers; like saying ‘when X=0, the endstop is -40 from here’. Follow all M206 commands with M500, to store the setting in the EEPROM, so your printer will remember this setting even if you remove power.
If you have a Multi-Colour machine with multiple extruders, the offset should be set such that extruder 0 is over the corner of the bed.
You can also adjust the Z height using the M206 command. M206 Z<value> where <value> is the amount in millimeters by which you wish to adjust the Z height. If the first layer is too close to the bed, you need to effectively move the bed down, so <value> will be negative. If the nozzle is too far from the bed during the first layer, <value> should be positive to raise the bed. The maximum adjustment is +/-1.27mm.
Heaters
Tick the monitor check box to report the temperatures of your heatbed and nozzle. Ensure that the readings are similar to the ambient temperature of the room.
Heatbed
Command the heatbed to 45C (warm), tick the monitor checkbox and verify that the heatbed temperature reading rises and stabilises around 45C, and that the heatbed is actually warm.
Hot end
N.B. Some RepRapPro Huxley kits shipped with a Melzi controller between August 2012 and the first week of October 2012 have an error in the firmware. Please see this forum topic for a solution http://forums.reprap.org/read.php?214,123839,159857#msg-159857
Check that the hot end fan is running. This needs to be on ALL THE TIME there is power to the printer – it should be connected directly to the 12V power input on the Melzi. It is part of the design of the hot end that the top part of it is continuously cooled, and the extruder will work extremely poorly, or not at all, if it is not cooled. If it is not running, check the connections, power, and the fan polarity.
Command the nozzle to 100C and watch the temperature rise, overshoot and eventually settle around 100C. Keep an eye on the nozzle during this test. If you see lots of smoke come out of the hot end, turn off the heater and check your wiring. You may have a short on the heater wires, or to the heater block, or there may be some contamination around the heater block. Check that you used the correct, clear, ptfe heatshrink on the thermistor, not black heatshrink.
Repeat the test with a target temperature of 200C. The nozzle should reach the target temperature in about 1 minute or less and settle within a couple of degrees of 200C. Some smell of oil burning off is not unusual – it’s the oil from machining the parts – but should dissipate after a minute.
Extruder
Once you have verified the nozzle behaves as expected, you can carry out a test extrusion by hand. Pull the printed tongue out of the extruder block, and remove the brass bowden start piece from the extruder block. Feed some PLA into the tube until it reaches the nozzle (beware of the filament snagging on the short piece of PTFE tube inside the barrel). Command the nozzle to 205C, and once it has reached and settled there, push the filament through and watch it extrude. The extrusion should be maintained with a steady but not excessive force.
Pull out the filament and reassemble the bowden tube for a test of the extruder drive mechanism. This time, click on MOTORS OFF or send an M84 command, and rotate the gears whilst manually feeding some PLA filament in through the extruder drive mechanism. Repeat the extrusion test, this time by manually rotating the large gear slowly.
Finally, try extruding material by commanding the E axis. In Pronterface, next to the ‘Extrude’ button in the bottom left of the window, set 5mm. Underneath, next to the ‘Reverse’ button, set the speed; 200mm/min is a good speed for an 0.5mm nozzle (which is the standard Huxley and Mendel size); 80 mm/min is good for an 0.3mm nozzle. Press the ‘Extrude’ button to extrude some filament. Once you’re happy everything is working, turn the hot end heater and heated bed to ‘Off’.