
I am creating a new delta RepRap called Lorenz (after the noted biologist Konrad Lorenz). It’s not yet complete, but if you want to get the CAD files it’s on Github here. This is the first of a series of posts about aspects of its design.
In order to make a RepRap as accurate (or more accurate) than the RepRap that printed it, it has to be adjustable. This is not a new idea: machine tools like lathes have always had screw-adjusters to allow you to get movements parallel and so on. The very first RepRap – Darwin – was designed by Ed Sells with adjustable clamped rods to set up all its major dimensions.
Adjustment in RepRap Lorenz will be achieved using one of the key advantages of 3D printing – the fact that shape complexity is free.
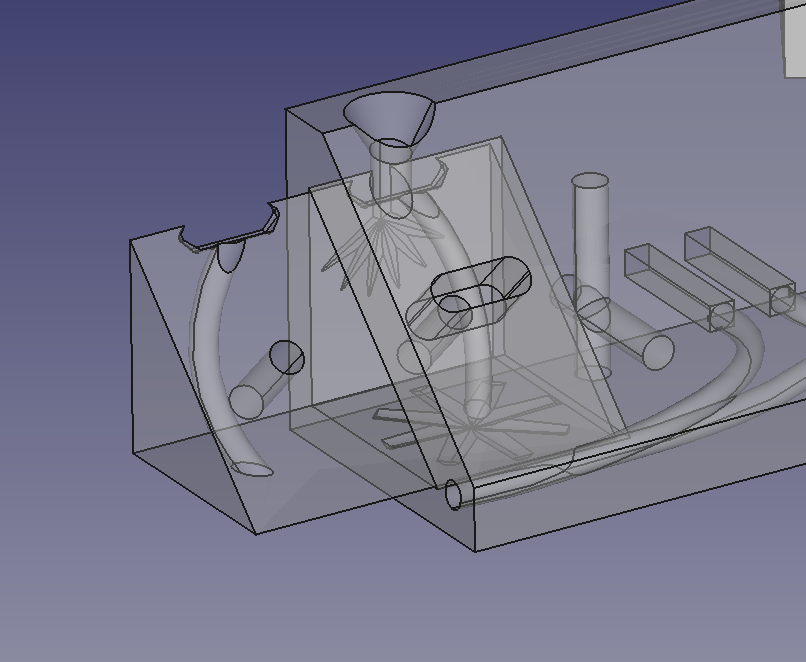
The picture above shows the end of a prismatic arm. This is joined to a mirror-image of itself (not shown) using the wedge-of-cheese shaped joiner that you can see. The arm needs to have an adjustable length, but the adjustment only needs to be done once at setup. It can then be locked for ever more. So a self-tapping screw goes in the slot shown, but is not fully tightened. You then set the length by twisting a screwdriver in the small gap between the arm and its mirror twin. Then you clamp the screws tight. Finally you dribble cyanoacrylate glue down the conical hole at the top. This flows into the fan-shaped indentation and also through the tube in the cheese-wedge to the star shape in the bottom. From these capillary forces draw the glue between the flat faces, where it sets.
Cyanoacrylate bonds PLA very well (in part because it is a solvent for it) and the resulting join is extremely solid.
This idea of leaving glue channels and spreading indentations in a print seems to me to be a simple one. But it could be used wherever joining was required – not just for adjustable parts.
Adrian
Connect with us
Keep up to date on the latest RepRap Ltd news: