DRAFT – these instructions are not final, and are likely to change.
Motor bracket
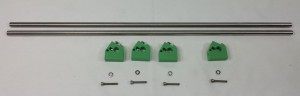
You will need the following parts:
| # |
Component |
Qty |
Type |
| 1246 |
Motor bracket |
4 |
Printed |
| 1186 |
M3x16mm button head screw |
3 |
Fastener |
| 258 |
M3 nut |
3 |
Fastener |
|
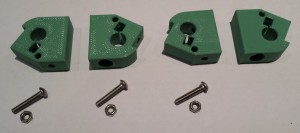 |
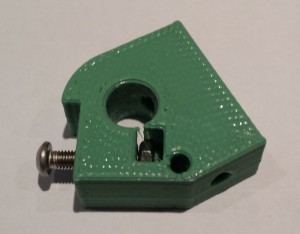
| Push an M3 nut into it’s pocket, then screw a button head screw into the nut, leaving it loose. |
 |
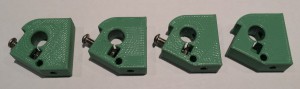
| Repeat for three motor brackets. |
 |
Motor and drive pulley
You will need the following parts:
| # |
Component |
Qty |
Type |
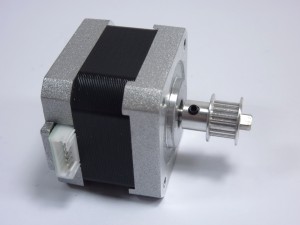
| 408 |
NEMA17 Stepper Motor |
1 |
|
| 782 |
Aluminium pulley |
1 |
Hardware |
|
M3 set screw |
1 |
Hardware |
|
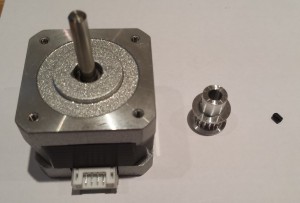 |
| Fit the set screw to the pulley, the slide the pulley onto the motor shaft, shank first. Set the pulley so there is approximately 1mm between the face of the motor and the end of the pulley, then tighten the set screw onto the flat of the motor shaft. |
 |
Motor assembly
You will need the following parts:
| # |
Component |
Qty |
Type |
| 1246 |
Motor brackets |
4 |
Assembled |
|
NEMA17 motor and pulley |
1 |
Assembled |
| 934 |
8mm ground bar |
2 |
Hardware |
| 241 |
M3x20mm cap head screw |
4 |
Fastener |
| 212 |
M3 washer |
4 |
Fastener |
|
 |
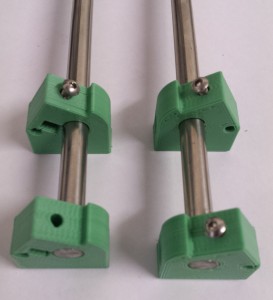
The ground bars should have clean chamfered ends, free from burrs, so they can slide easily into the relevant parts without causing any damage. Check all the ground bars before proceeding and file any burrs away as necessary. You may damage the linear bearings when you fit them if you do not do this.
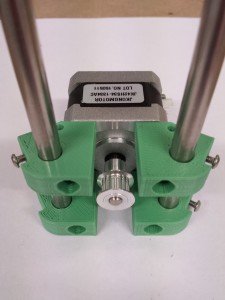
| Slide two motor brackets onto one end of each bar. Take care to ensure the orientation of the brackets matches that shown in the photograph. |
 |
| Attach the motor brackets to a motor using the cap head screws. A washer must be fitted under the head of each screw. This is used to lock the bar in place, although it should be left slack at this stage. |
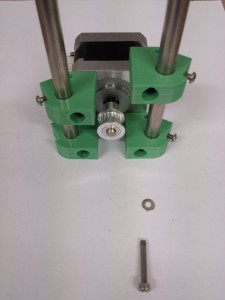 |
The finished assembly should match the photograph.
NOTE: The motor wiring connector should always point to the side, not up or down. Also, when you build the next two assemblies like this, make sure you build one with the connector pointing the OPPOSITE DIRECTION. This is to help with the wiring, later. |
 |
Repeat
Repeat the above steps until you have three assemblies.


