Goal
TIP: Click on pictures in the instructions to see a larger version.
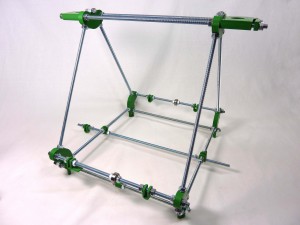
| By the end of this stage, your machine should look like this. |
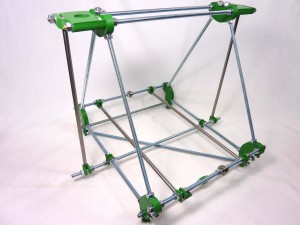 |
Frame triangles
| # |
Component |
Qty |
Type |
| 912 |
Frame vertex |
1 |
Printed |
| 910 |
Frame vertex foot |
1 |
Printed |
| 1010 |
Frame vertex foot mirrored |
1 |
Printed |
| 264 |
Bar-clamp |
1 |
Printed |
| 911 |
M8x370mm studding |
3 |
Hardware |
| 689 |
M8 nuts |
14 |
Fastener |
| 699 |
M8 serrated washers |
14 |
Fastener |
| 950 |
Measuring jig (3mm MDF) |
1 |
Laser cut |
|
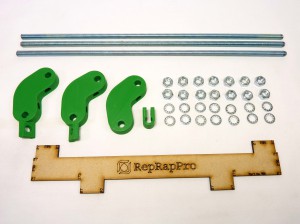 |
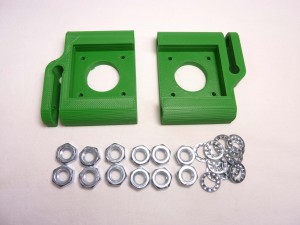
The footed frame vertices are not all the same; there are two pairs. For each frame triangle, use a pair of vertices with feet that point in different directions as shown above.
Frame triangle assembly x 2
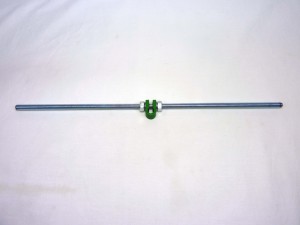
| Starting at the base of the triangle, take one piece of M8 studding, and slide a bar-clamp to the centre of the rod. Put an M8 serrated washer and M8 nut either side of the bar-clamp, and very loosely screw the nuts up to the bar-clamp. |
 |
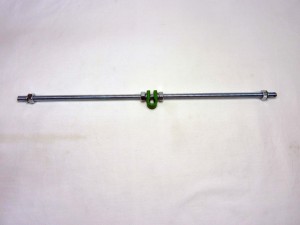
| Put an M8 nut followed by an M8 serrated washer on each end of the M8 studding. |
 |
| Then push a frame-vertex-foot on each end. The orientation of the regular and normal version doesn’t matter for the moment. |
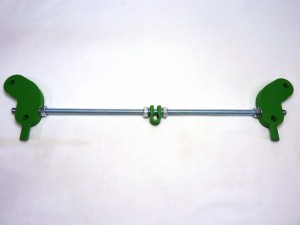 |
| Put an M8 serrated washer, and M8 nut on each end of the studding. This secures printed part. |
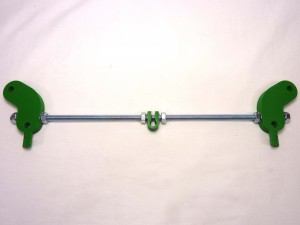 |
| Take two more pieces of studding, and put an M8 nut followed by an M8 serrated washer on each end. |
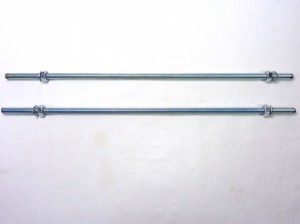 |
| Connect them to the frame-vertex-foot. Where the studding meet at the apex of the triangle, use the frame-vertex, with no foot. On each side of each vertex, there should be an M8 serrated washer and M8 nut. |
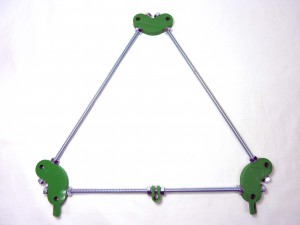 |
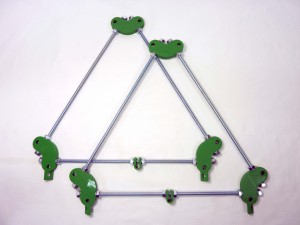
| Now repeat same for a second triangle with an identical set of components. Your frame triangles should end up looking like this. |
 |
Fine tune triangle sizes
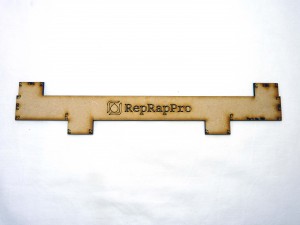
| The nuts on both frame triangles need to be tightened to make them rigid. The distance between the vertices is critical. The kit has a laser-cut measuring template provided. Use this to make checking the gaps easy, or use a ruler. Please, be patient, give it time, this is very important step. |
 |
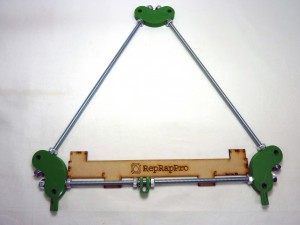
| For each frame, measure the distance between the vertices on all three sides. The distance you should be aiming for is 290mm. But more important is to make them all six the same. The better aligned your frame is, the better your prints will be when printing large and/or tall objects. |
 |
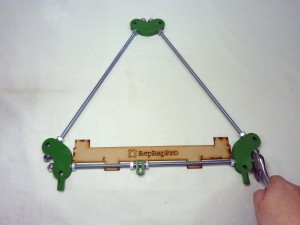
| Gently tighten all the M8 nuts ensuring the distance between vertices of 290mm is maintained. Try to get this as accurate as possible, with less than a millimetre of variation in all. |
 |
| You can check the accuracy of your triangle frames by placing them on top of each other. |
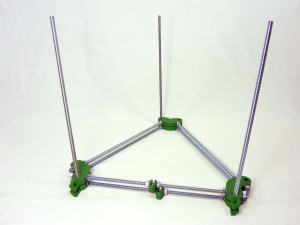 |
Cross bars
| # |
Component |
Qty |
Type |
| 264 |
Bar clamp |
3 |
Printed |
| 935 |
Bar clamp /W endstop |
1 |
Printed |
| 945 |
Y motor spacer |
1 |
Printed |
| 929 |
M8x330mm studding |
4 |
Hardware |
| 931 |
M8x445mm studding |
2 |
Hardware |
| 689 |
M8 nuts |
26 |
Fastener |
| 558 |
M8 serrated washer |
26 |
Fastener |
| 310 |
608 Bearing |
2 |
Hardware |
|
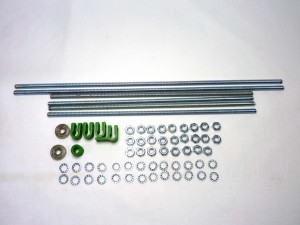 |
| The above parts are used to build four cross bars, which join the triangles together. First assemble the front bottom bar using 330mm studding. |
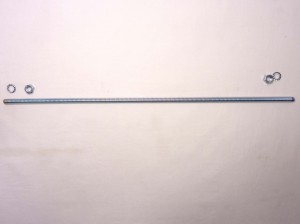 |
| It is easiest to start in the middle and work outwards, so you don’t have to screw the M8 nuts all the way along the studding. Fit an M8 nut, then a serrated washer. Repeat for the other side of the bar. |
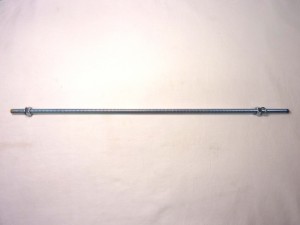 |
| For the other bottom bar, starting from the middle of the 330mm M8 studding, fit: Y motor spacer, M8 serrated washer, M8 nut and finally another serrated washer. Repeat this layout on the opposite side of the X motor spacer. |
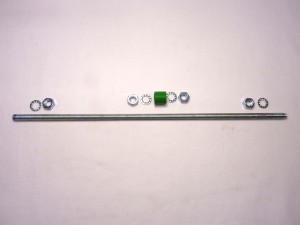 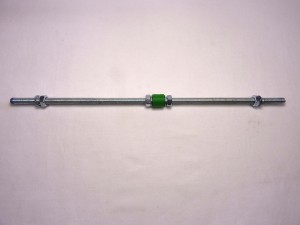 |
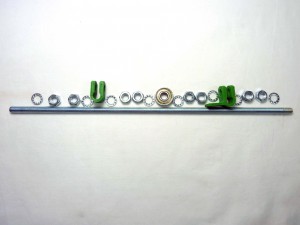
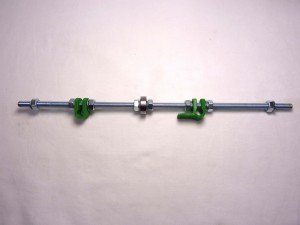
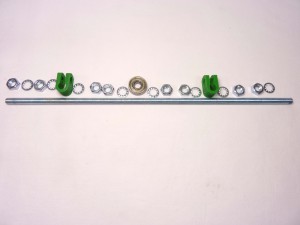
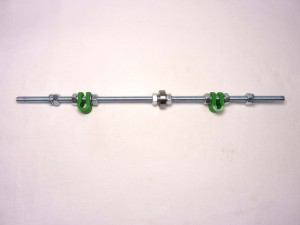
| Next assemble the top bars. For the back, starting at the middle of 330mm M8 studding: 608 bearing, M8 serrated washer, 2 X M8 nuts, M8 serrated washer, bar clamp,M8 serrated washer, 2X M8 nuts & a M8 serrated washer. The arrangement on the other side of the bearing is identical, except the bar clamp is swapped out for the bar clamp with the integrated endstop holder. NOTE: THE MOUNT SHOULD POINT INWARDS TOWARDS THE BEARING AS SHOWN |
  |
| Now repeat the previous step for the other top bar. This is identical, except the bar clamp with the end stop holder is replaced with a standard bar clamp. |
  |
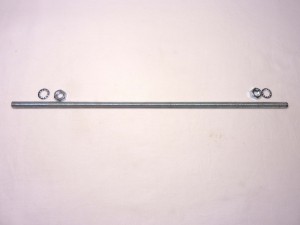
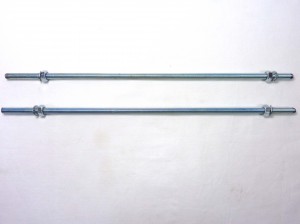
| Finally assemble the two cross bars at the very top gantry of the machine. Unlike the others these use 445mm studding. Starting at the middle, use an M8 nut and serrated washer. Repeat for the end. Next do the second upper cross bar which is identical to the previous. |
  |
| You have now completed all six crossbars: |
|
Assemble the frame
| # |
Component |
Qty |
Type |
|
Frame triangle assembly |
2 |
Assembled |
|
Cross bar assembly |
6 |
Assembled |
| 295 |
Z motor bracket |
2 |
Printed |
| 557 |
M8 nut |
12 |
Fastener |
| 558 |
M8 serrated washer |
12 |
Fastener |
|
 |
Mounting the cross bars
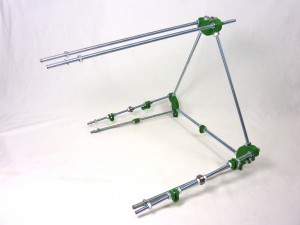
| Take the cross bar assemblies, and fit them into one of the triangles. The cross bars with the bearings go on the bottom. The cross bar with the bar-clamp with the extra tab should go at the back, on the right and the bottom cross bar with the Y motor spacer should also go on the back. |
 |
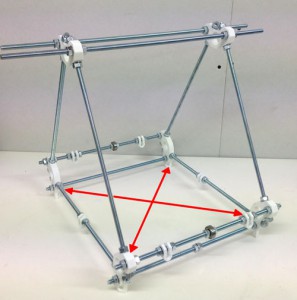
| Slide the other triangle assembly onto the rods. The triangles should be orientated such that the diagonal holes in the feet face each other. |
 |
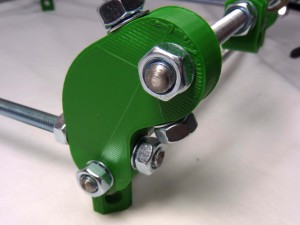
| Put an M8 serrated washer and M8 nut on the end of each bar, as it passes through each frame-vertex-foot. Don’t put nuts and washers on the end of the very top cross bars yet, |
 |
| Then fit the second triangle to the other end of the cross bars, with an M8 serrated washer and M8 nut on the end of bottom each bar, as it passes through each frame-vertex-foot. |
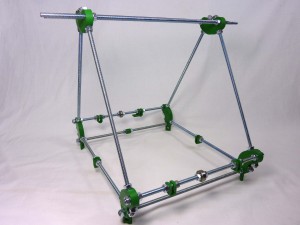 |
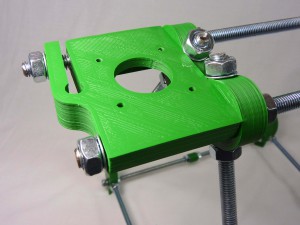
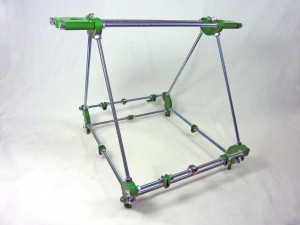
| Slide a Z motor mount onto each end of the top rods. This may need a little force as the holes through the z motor mounts tend to be quite a tight fit on the M8 threaded rods; it’s a good idea to make sure you can push the spare length of M8 threaded rod into each of the z motor mount holes before trying to fit them to your frame. Equalise the length the rods stick out. Use 4 M8 nuts and serrated washers to tighten the mounts to the frame. Leave the nuts on the clamp of the mounts loose for the time being. |
  |
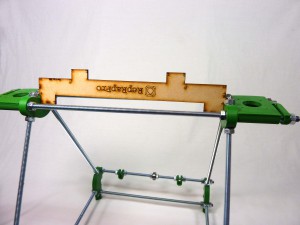
| At this stage, the frame should be quite loose, so just jiggle everything around until all the angles look about right. Once you are happy with this step, you can tighten the nuts on the cross bars. The distance between the frame vertices along the cross bars should be 286mm. |
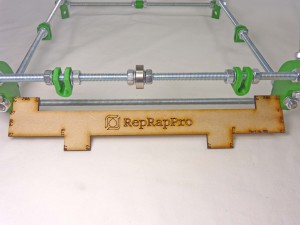 |
| Check the spacing between the top bars is also 286mm. |
 |
Mounting the Z Brace
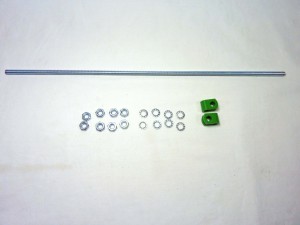
| # |
Component |
Qty |
Type |
| 264 |
bar-clamp |
2 |
Printed |
| 930 |
M8x465mm threaded rod |
1 |
Hardware |
| 689 |
M8 nut |
8 |
Fastener |
| 699 |
M8 serrated washer |
8 |
Fastener |
|
 |
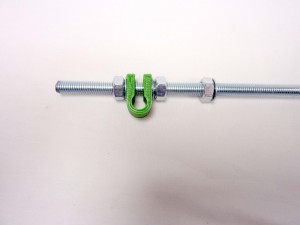
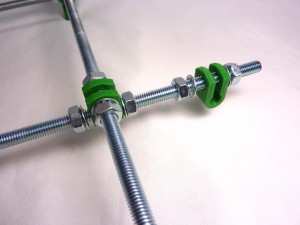
| Start by adding (right to left), an M8 serrated washer, 2X M8 nut, serrated washer, bar clamp, serrated washer and an M8 nut to the M8x465mm threaded rod. |
 |
| Insert this assembly through one of the bottom bar clamps, and add another serrated washer and M8 nut. |
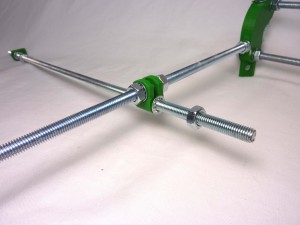 |
| Add another M8 nut and washer and keep feeding this rod through the other clamp. |
 |
| Repeat the same arrangement of nut washers and clamp for the opposite side of the machine. Everything should still be reasonably loose at this stage. |
 |
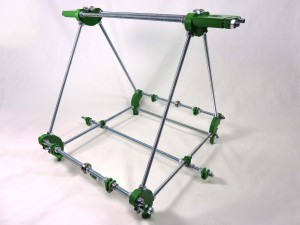
| Equalise the position of the rod, and loosely tighten everything along the rod. This isn’t the final position, but you need to ensure nothing falls off in the subsequent steps. |
 |
Mounting the Diagonal Cross Brace
| # |
Component |
Qty |
Type |
| 930 |
M8x465mm threaded rod |
1 |
Hardware |
| 689 |
M8 nut |
4 |
Fastener |
| 699 |
M8 serrated washer |
4 |
Fastener |
|
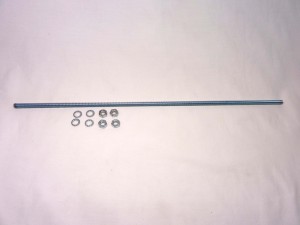 |
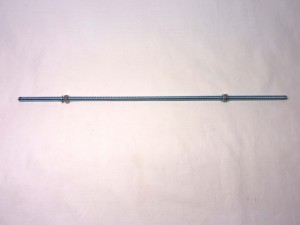
| Start by adding (starting at the centre working outwards outwards), an M8 serrated washer and a serrated washer to both sides of the M8x465mm threaded rod. |
 |
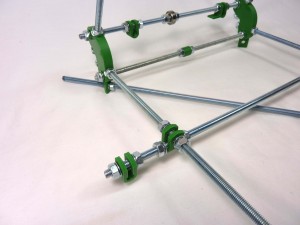
| Insert this assembly one of the holes in the feet of the machine from the inside. The rod should run from the back left of the machine to the front right (i.e. not the side with the bar clamp with integrated end stop mount as shown). Ensure the nuts are screwed on sufficiently far that you may the insert the opposite side of the rod through the corresponding food on the opposite corner of the machine. |
 |
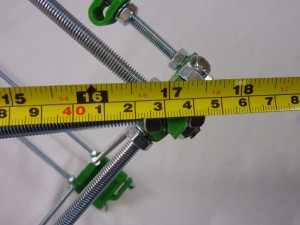
| Equalise the amount of rod sticking out of each foot and add an M8 serrated washer and nut to each end to secure. Using a tape measure, measure the distance between the inside faces of the feet. Using a spanner, adjust and tighten the nuts until this distance is 431mm. |
 |
Fit the Z and Y axis smooth rods
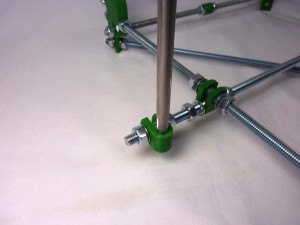
| You can now slide the two Z smooth rods (length 342mm) into place. When tightening the M8 nuts on the top cross bars, please note that you do not need to tighten the nuts which clamp against the Z smooth rods too much, only enough to stop the smooth rod from sliding down. |
 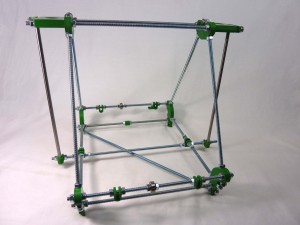 |
| Before tightening the bar clamps on the bottom cross bar, slide the Y axis smooth rods (395mm) into place. |
 |
Aligning the frame
| Place the frame on a flat surface. Wooden furniture, by and large, is not flat. But thick kitchen worktops are very flat. Check all triangle sides (x6) are equal. They should be 290mm. This is the length of the jig at it widest point. |
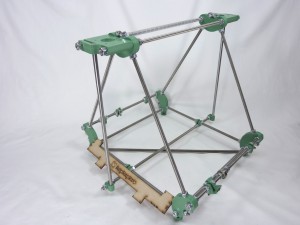 |
| Check cross bars (x6, between vertices of triangles) are all equal. Vertex to vertex should measure 286mm. This is the distance between the outer most edges, of the wider of the stepped sections of the jig. |
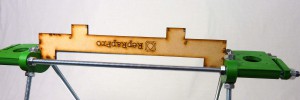 |
| If the frame doesn’t sit flat on the table (assuming a flat table), use a shim to lift the low leg up, and press the frame on the corners that are high, so the base square sits flat on your surface. This photo is of Huxley, but the process is identical |
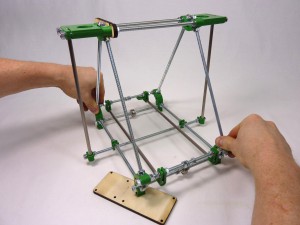 |
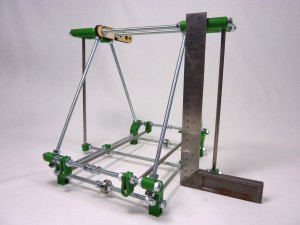
| Check the frame triangles are square. Push the frame along the top bars if it is not, until they are square.This photo is of Huxley, but the process is identical |
 |
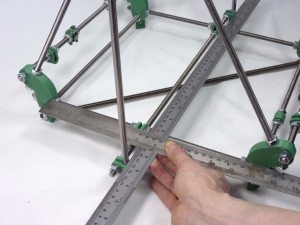
| Square the Z rods front/back. Use a straight edge, touching one side of the Z rods. Measure from the edge of the straight edge to the frame-vertex. It should be 141mm to the nearest edge of the 8mm rod. |
 |
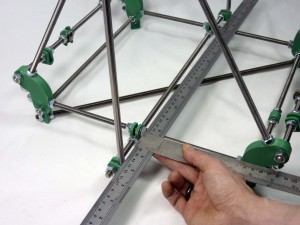
| Equalise the length by moving the frame clip along the triangle bottom rod. Repeat this a number of times, switching sides, to get it accurate. You can also look side-on at the Z bars, and make sure they are parallel. If they are not, check the base (diagonally between the frame-vertices-foot) is square. |
 |
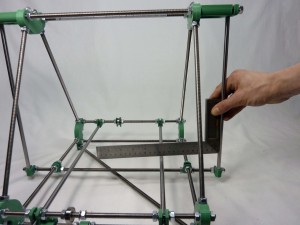
| Slide the remaining smooth rod into the Y bar clamps. Square the Z rods left/right, using a set square. Use a set-square to get the angle of the Z smooth rods correct. Push the lower bar through the frame clamps to adjust. |
 |
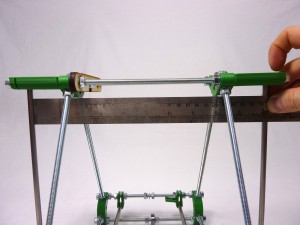
| Measure the distance between the Z rods top…(This photo is of Huxley, but the process is identical) |
 |
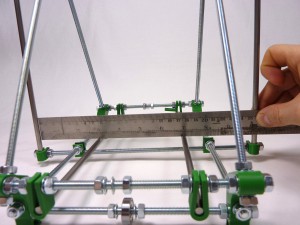
| …and bottom, to check they are parallel. The distance between the inside edges should be 414mm .(This photo is of Huxley, but the process is identical) |
 |
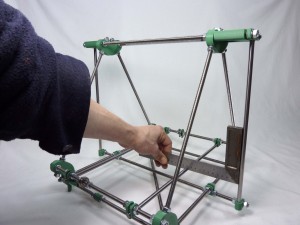
| You can now tighten the M8 nuts along the bottom cross bar. You will have to remove the Z rods to fit the X axis; only undo the outer nut on each side, you should then be able to put them back in without moving the frame too much, though you may need to check it again after fitting the X axis. |
 |
TIP: You can revisit this checklist at any point during building and running your machine, to check your frame is still square.
Frame finished
| You will now have an assembled RepRapPro Mendel frame. |
 |


