Overview
| This section shows you how to assemble the extruder drive. All the parts for the extruder drive, except for the NEMA17 motor, should be in the bag labelled ‘Extruder drive set’. |
 |
| NOTE: The ‘retaining tongue‘ that is included in the extruder drive set secures the Bowden cable from the hot end into the extruder drive. You’ll need it later, so hang on to it. |
 |
Extruder body
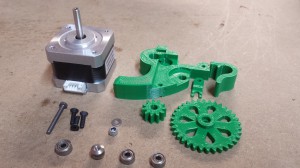
To assemble the extruder drive body, you will need the following:
| Component |
Type |
Quantity |
| NEMA17 motor |
– |
1 |
| Extruder drive block |
Extruder drive |
1 |
| 623 bearing (10mm diameter) |
Extruder drive |
1 |
| M3 washer |
Extruder drive |
1 |
| M3x12mm countersunk socket screw |
Extruder drive |
3 |
| Extruder small gear |
Extruder drive |
1 |
|
 |
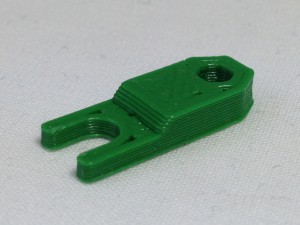
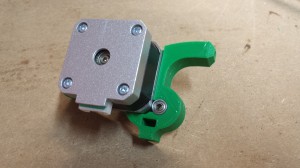
| Take the extruder body, and put the 623 bearing in the hole shown. One M3x12mm countersunk screw goes in from the back, and the washer goes on top of the bearing. This washer is sandwiched between the bearing and the motor; without it, the bearing will not turn, and the extruder drive will function poorly. |
 |
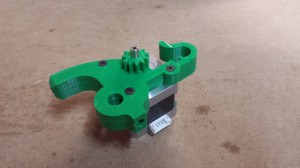
| Fit the motor on top of this, then attach the other two M3x12mm countersunk screws, to mount the motor solidly. |
 |
| Push the small gear onto the motor shaft. This should be a tight fit. Ensure the flat part of the bore of the gear is aligned with the flat on the motor shaft before applying too much force. The gear has a small lip at the bottom of the teeth. This side must be against the drive block face. |
 |
Assemble the rest of the drive
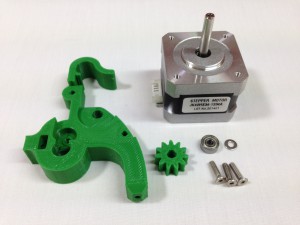
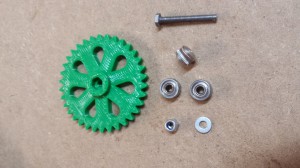
Now assemble the large gear drive assembly. For this you will need:
| Component |
Type |
Quantity |
| Extruder large gear |
Extruder drive |
1 |
| Hobbed insert |
Extruder drive |
1 |
| M3 washer |
Extruder drive |
1 |
| M3 nyloc nut |
Extruder drive |
1 |
| M3x25mm hex head screw |
Extruder drive |
1 |
| MR93ZZ bearing (9mm diameter) |
Extruder drive |
2 |
|
 |
| Push the screw through the gear. The hexagon head of the screw should be held tightly by the plastic part. Then slide an M3 washer on to the screw. |
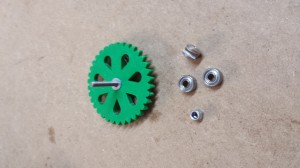 |
| Next slide one of the MR93ZZ bearings on, followed by the hobbed insert. The insert is symmetrical so it doesn’t matter which way round it is fitted, but it needs to be screwed tight. |
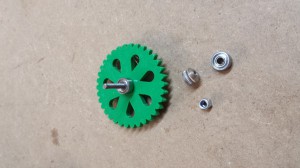 |
| Push the second MR93ZZ bearing into the extruder-drive-block, next to the motor. |
 |
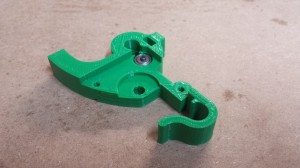
| Now push the large gear sub-assembly into place … |
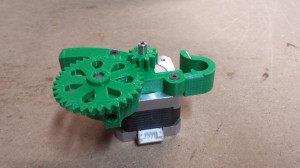 |
| … and secure it there with the M3 nyloc nut. Check that the large gear can turn smoothly, by turning it by hand. |
 |
Mounting the drive on the printer
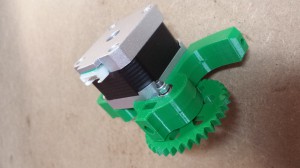
| The extruder drive assembly can now be mounted on to the machine. The x-axis-plate is profiled to receive the extruder-drive-block from one side, so push it down with a rotating motion and it will lock into place, using the mass of the motor to keep it there. |
 |


